W&B recommends fully managed deployment options such as W&B Multi-tenant Cloud or W&B Dedicated Cloud deployment types. W&B fully managed services are simple and secure to use, with minimum to no configuration required.
mandatory components:
- VPC
- Cloud SQL for MySQL
- Cloud Storage Bucket
- Google Kubernetes Engine
- Memorystore for Redis
- KMS Crypto Key
- Load Balancer
- Memory store for Redis
- Pub/Sub messages system
Prerequisite permissions
The account that will run the terraform need to have the roleroles/owner in the Google Cloud project used.
General steps
The steps on this topic are common for any deployment option covered by this documentation.-
Prepare the development environment.
- Install Terraform.
- We recommend creating a Git repository with the code that will be used, but you can keep your files locally.
- Create a project in Google Cloud Console.
- Authenticate with Google Cloud (make sure to install gcloud before) using
gcloud auth application-default login.
-
Create the
terraform.tfvarsfile. Thetvfarsfile content can be customized according to the installation type, but the minimum recommended will look like the example below.The variables defined here need to be decided before the deployment because. Thenamespacevariable will be a string that will prefix all resources created by Terraform. The combination ofsubdomainanddomainwill form the FQDN that W&B will be configured. In the example above, the W&B FQDN will bewandb-gcp.wandb.ml. -
Create the file
variables.tf. For every option configured in theterraform.tfvarsTerraform requires a correspondent variable declaration.
Deployment - Recommended (~20 mins)
This is the most straightforward deployment option configuration that will create allMandatory components and install in the Kubernetes Cluster the latest version of W&B.
-
Create the
main.tffile. In the same directory where you created the files in the General Steps, create a filemain.tfwith the following content: -
Deploy W&B.
To deploy W&B, execute the following commands:
Other deployment options
You can combine all three deployment options adding all configurations to the same file. The Terraform Module provides several options that can be combined along with the standard options and the minimal configuration found inDeployment - Recommended.
Manual configuration
To use a Google Cloud Storage bucket as a file storage backend for W&B, you will need to create a:Create PubSub Topic and Subscription
Follow the procedure below to create a PubSub topic and subscription:- Navigate to the Pub/Sub service within the Google Cloud Console.
- Select Create Topic and provide a name for your topic.
- At the bottom of the page, select Create subscription. Ensure Delivery Type is set to Pull.
- Click Create.
pubsub.admin role on this subscription. For details, see the Google Cloud Pub/Sub access control documentation.
Create Storage Bucket
- Navigate to the Cloud Storage Buckets page.
-
Select Create bucket and provide a name for your bucket. Ensure you choose a Standard storage class.
Ensure that the service account or account that your instance is running has both:
- access to the bucket you created in the previous step.
storage.objectAdminrole on this bucket. For details, see the Google Cloud Storage IAM permissions documentation.
Your instance also needs theiam.serviceAccounts.signBlobpermission in Google Cloud to create signed file URLs. AddService Account Token Creatorrole to the service account or IAM member that your instance is running as to enable permission. -
Enable CORS access. This can only be done using the command line. First, create a JSON file with the following CORS configuration.
Note that the scheme, host, and port of the values for the origin must match exactly.
-
Make sure you have
gcloudinstalled, and logged into the correct Google Cloud project. -
Next, run the following:
Create PubSub Notification
Follow the procedure below in your command line to create a notification stream from the Storage Bucket to the Pub/Sub topic.You must use the CLI to create a notification stream. Ensure you have
gcloud installed.- Log into your Google Cloud project.
-
Run the following in your terminal:
Configure W&B server
-
Finally, navigate to the W&B
System Connectionspage athttp(s)://YOUR-W&B-SERVER-HOST/console/settings/system. -
Select the provider
Google Cloud Storage (gcs). -
Provide the name of the GCS bucket.
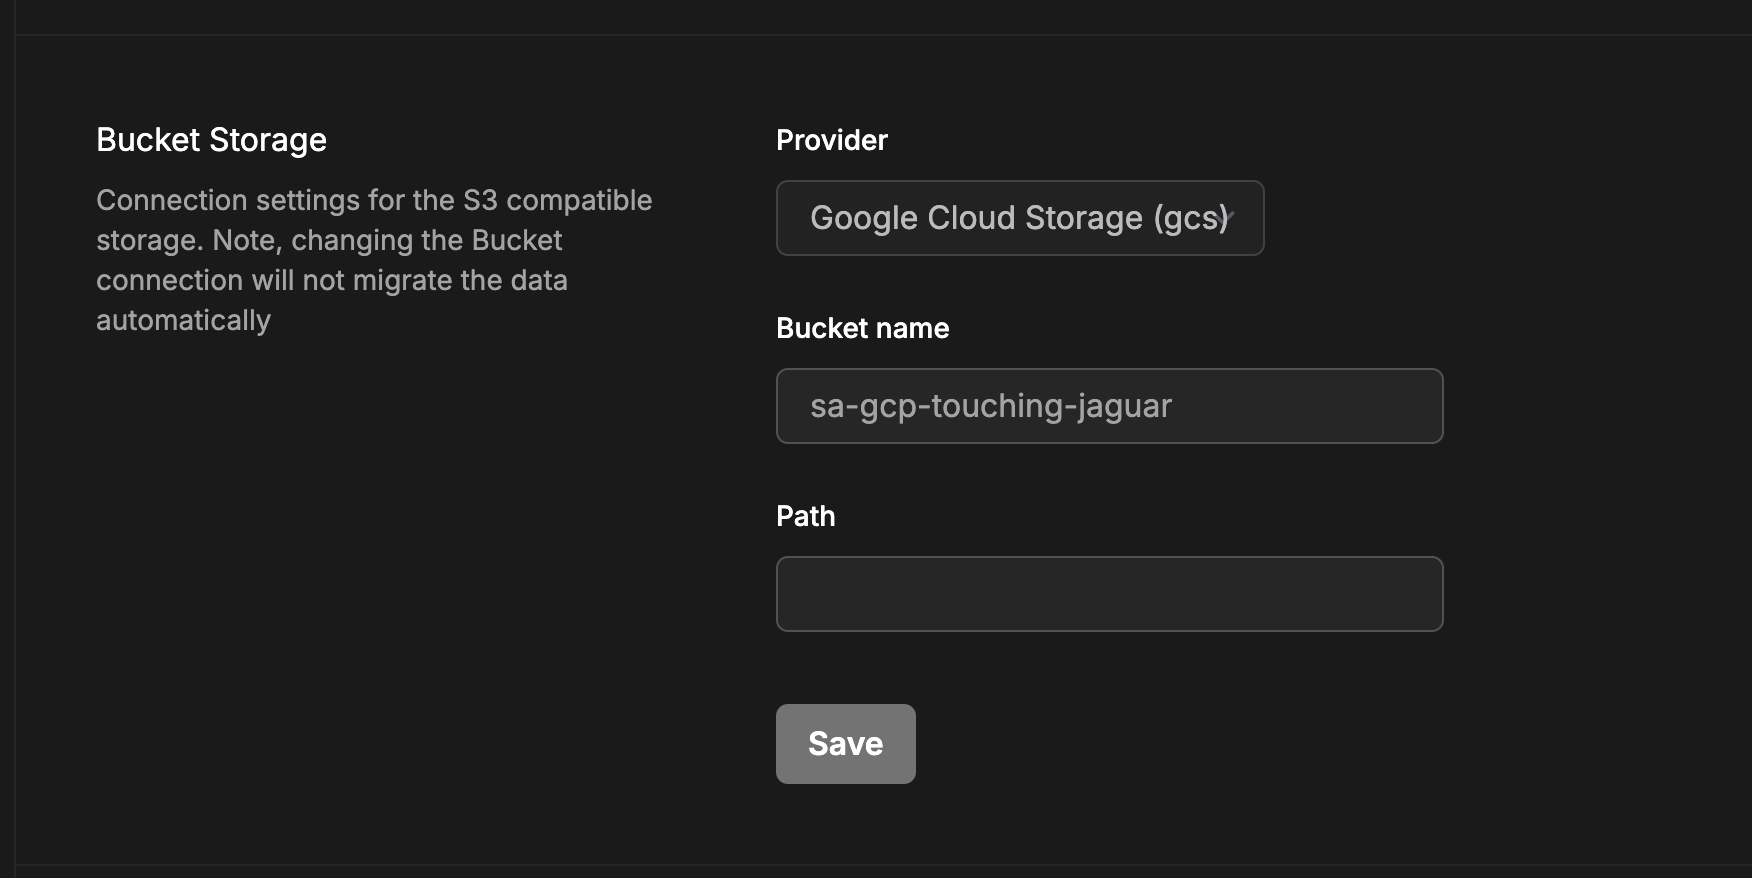
- Press Update settings to apply the new settings.
Upgrade W&B Server
The Operator upgrades W&B automatically by the W&B Operator. To turn this off, you can update the user spec to override the images from the system console. To pin the images to a specific version:-
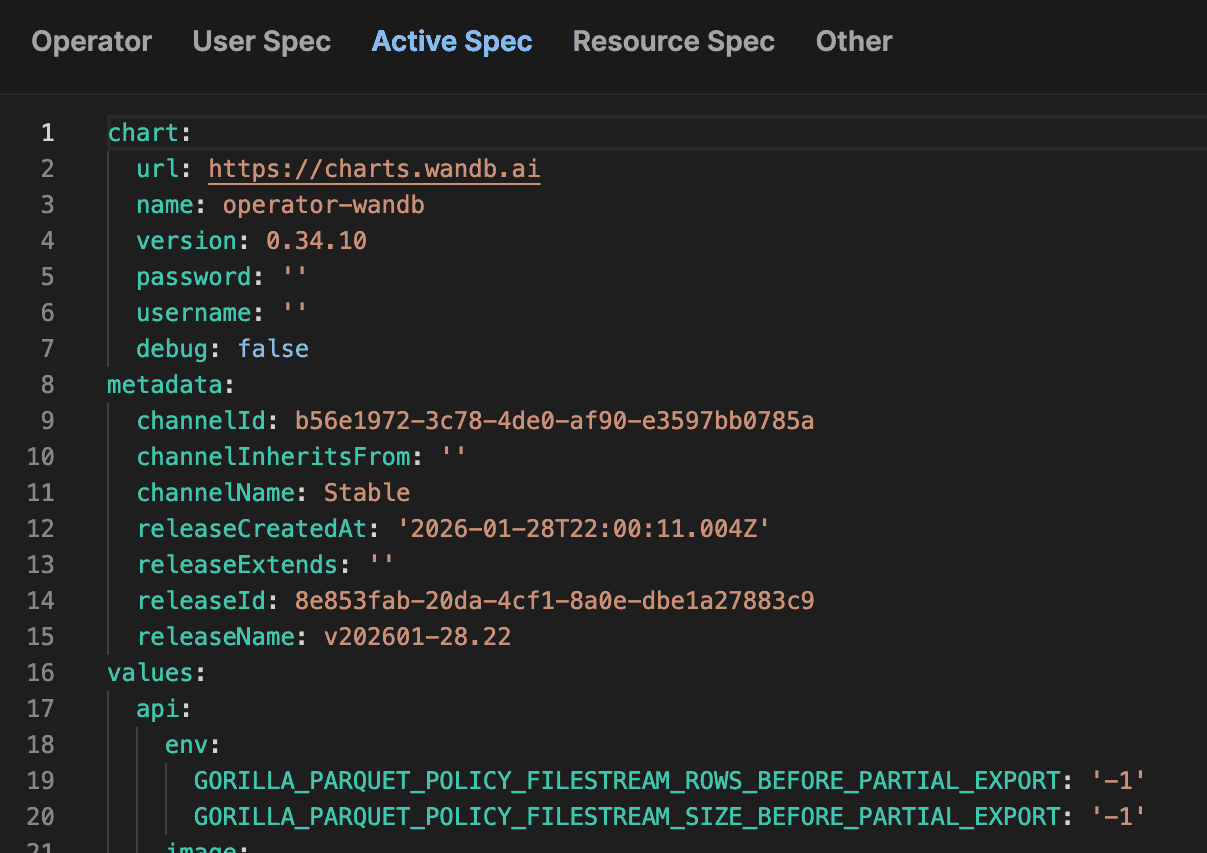
Access the ActiveSpec in the system console
https://<W&B URL>/console/settings/advanced/spec/active. -
Copy the components image configuration, which looks similar to:
-
Paste the component configuration replacing the image tag in the
UserSpec.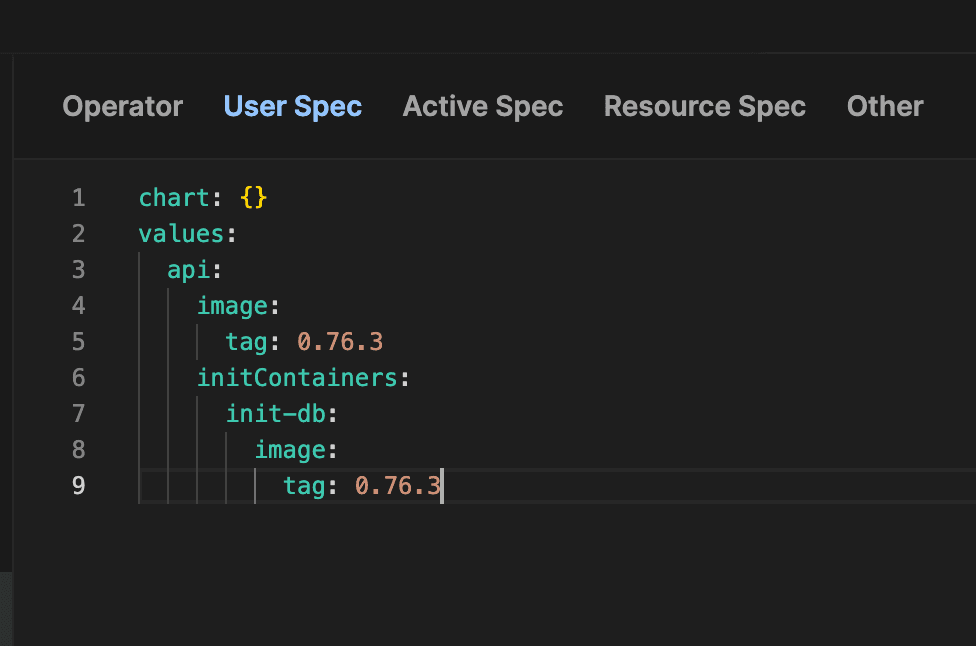
- Click Save.
-
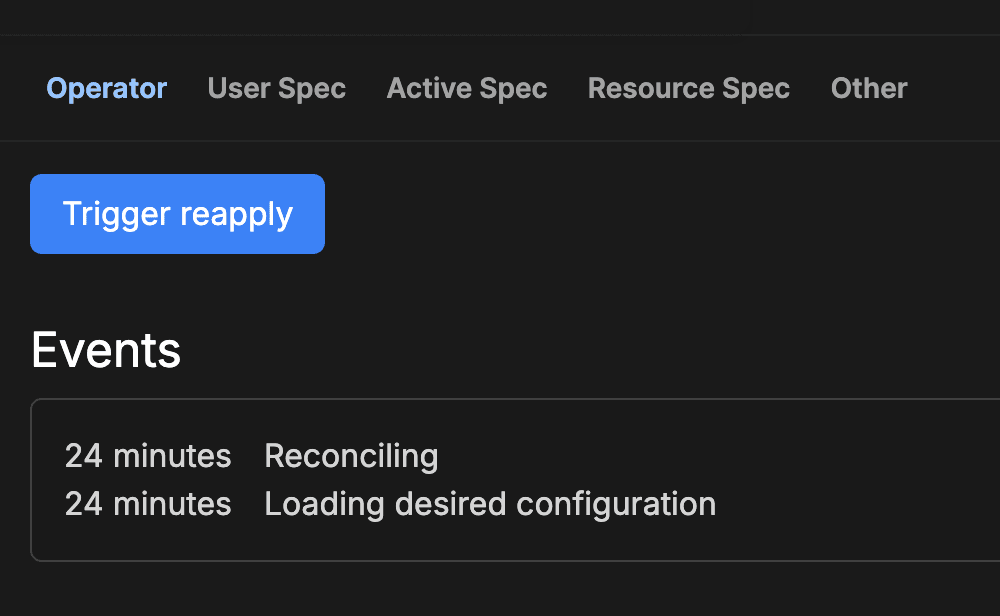
Access the tab
Operatorand clickTrigger reapply.